A portable, easy-to-use device designed for quick repairs and small sewing projects. Ideal for home, office, or travel, it offers convenience and versatility for beginners and experienced users alike.
1.1 What is a Handheld Sewing Machine?
A handheld sewing machine is a portable, compact device designed for quick repairs and small-scale sewing projects. It is typically lightweight, battery-powered, or manual, allowing for cordless operation. These machines are ideal for stitching fabrics like cotton, silk, and denim. They are perfect for home use, travel, or emergency kits. Unlike traditional sewing machines, handheld versions are designed for simplicity and ease of use, making them accessible to beginners. Their compact size and versatility make them a practical tool for minor alterations, hemming, or crafting. They are not intended for heavy-duty sewing but excel at providing convenience for small, immediate sewing needs. This makes them a popular choice for both hobbyists and professionals seeking a portable solution.
1.2 Benefits of Using a Handheld Sewing Machine
A handheld sewing machine offers unparalleled convenience and portability, making it ideal for quick repairs, small projects, and on-the-go use. Its compact design allows easy storage in bags or drawers, ensuring it’s always accessible. The machine is lightweight, reducing fatigue during use, and often requires no electricity, making it perfect for travel or remote locations. It is also cost-effective and user-friendly, suitable for beginners and experienced sewers alike. The ability to handle various fabrics, from delicate cotton to thicker denim, adds to its versatility. Additionally, it eliminates the need for bulky equipment, saving space and time. These benefits make it an essential tool for anyone seeking a practical and efficient sewing solution.
Safety Instructions
Always follow safety guidelines to avoid burns, fire, or electric shock. Read the manual carefully before use and ensure proper handling to maintain safety while operating the machine.
2.1 General Safety Precautions
Always read the instruction manual thoroughly before using the handheld sewing machine to ensure safe operation. Keep the machine away from water and flammable materials to prevent fire hazards. Avoid using damaged cords or plugs, as they may cause electric shock. Never leave the machine unattended while in use, especially near children or pets. Ensure proper ventilation to avoid overheating. Use only recommended needles and accessories to maintain safety standards. Avoid wearing loose clothing that could get caught in the machine. If the device malfunctions, disconnect it immediately and contact a professional for repairs. Following these precautions will help minimize risks and ensure a safe sewing experience.
2;2 Specific Safety Guidelines for Handheld Sewing Machines
Always handle the machine with care to prevent accidental needle pricks. Keep fingers away from moving parts to avoid injury. Use the correct needle type and ensure it is securely installed with the flat side facing forward. Never operate the machine near open flames or sparks, as some models may produce heat. Store batteries safely, following the manufacturer’s guidelines for disposal and replacement. Avoid sewing near loose fabrics or long hair that could entangle with the needle. Ensure the machine is turned off before changing needles or adjusting parts. Regularly inspect the device for damage and maintain it according to the manual; Adhering to these guidelines ensures safe and effective use of the handheld sewing machine.
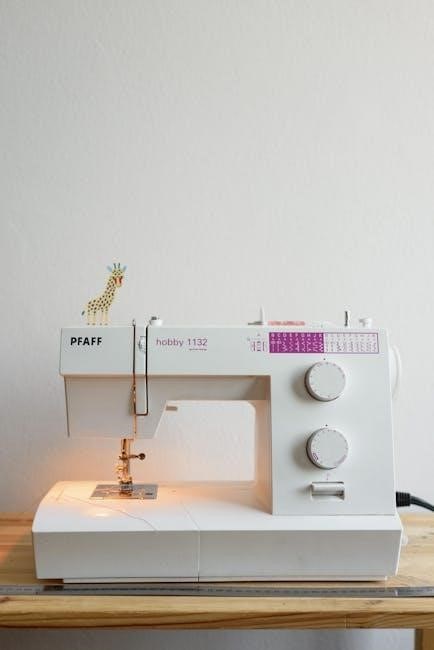
Machine Components
Key parts include the needle, bobbin, spool pin, and power switch. These components work together to ensure smooth stitching and efficient operation of the handheld device.
3.1 Overview of Parts and Accessories
A handheld sewing machine typically includes essential components like the sewing needle, bobbin, spool pin, and power switch. Accessories such as extension tables, extra needles, and sewing kits may also be included. The machine is designed for portability and ease of use, with a compact structure that allows for precise stitching. Understanding each part is crucial for proper operation and maintenance. The needle is responsible for creating stitches, while the bobbin holds the thread. Additional features like adjustable stitch length and built-in lights enhance functionality. Always refer to the instruction manual for specific details on your model’s components and accessories, ensuring optimal performance and safety during use.
3.2 Understanding the Sewing Machine Needle
The sewing machine needle is a critical component, responsible for creating stitches. It must be installed correctly, with the flat side of the needle shank facing the front of the machine. Using a standard sewing machine needle, typically a 14 style DHx1, is recommended. Incorrect needle installation can lead to poor stitching, machine damage, or breakage. Always ensure the needle is securely fastened and aligned properly before use. Regularly inspect the needle for dullness or damage, as a blunt needle can cause thread breakage or fabric tears. Refer to the instruction manual for specific needle requirements and replacement guidelines to maintain optimal performance and prevent issues during operation.
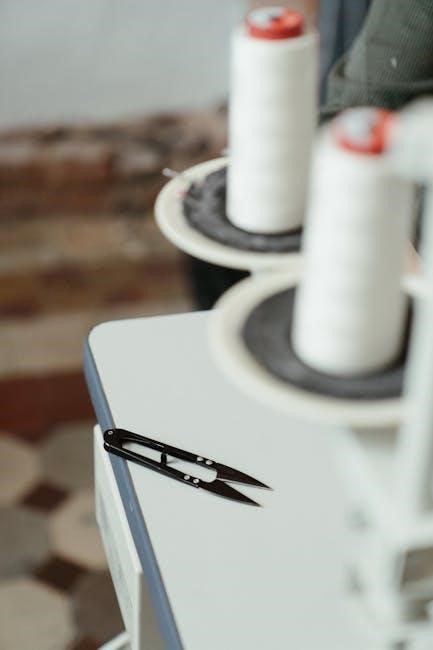
3.3 Bobbin and Thread Requirements
The bobbin and thread are essential for proper stitching. Use a class 15 metal bobbin, as specified in the manual, to ensure compatibility. Thread choice matters; select a standard sewing thread suitable for your fabric type. Avoid using thick or specialized threads that may jam the machine. Wind the thread evenly onto the bobbin, leaving a small gap at the top. Insert the bobbin into the machine correctly, following the diagram provided. Ensure the thread is properly seated in the bobbin case and pulled gently to prevent tangling. Using the wrong bobbin size or incorrect thread can lead to poor stitch quality or machine malfunction. Always refer to the manual for specific recommendations on thread and bobbin usage to maintain optimal performance and avoid common issues during sewing. Keep spare bobbins and threads handy for quick replacements. This ensures uninterrupted sewing and consistent results.
Setting Up the Machine
Thread the machine correctly, insert batteries, and prepare the bobbin as instructed. Ensure the needle is installed with the flat side facing forward for proper operation.
4.1 Threading the Machine
Threading your handheld sewing machine is essential for smooth operation. Begin by inserting the thread through the spool pin and gently guide it through the machine’s tension guide. Ensure the thread is not tangled or twisted. Next, pass the thread through the needle from back to front, leaving at least 2 inches of thread. This prevents the thread from slipping out while sewing. Always use the recommended thread type and size to avoid any issues. Proper threading ensures consistent stitching and prevents thread breakage. If the needle is already pre-threaded, simply pull the thread gently to ensure it’s seated correctly before starting your project. Follow the manufacturer’s guidelines for specific threading instructions to achieve the best results.
4.2 Installing the Needle Correctly
Installing the needle correctly is crucial for proper machine function. Use a standard sewing machine needle, ensuring it aligns with the machine’s specifications. To install, locate the needle bar and lift it to its highest position. Insert the needle with the flat side of the shank facing the front of the machine. Gently push the needle up until it clicks into place. Ensure the needle is securely seated to avoid wobbling or breaking during use. Refer to your machine’s manual for specific instructions, as some models may have slightly different procedures. Proper needle installation ensures smooth stitching and prevents damage to the machine or fabric. Always handle the needle carefully to avoid injury.
4.3 Preparing the Bobbin
Preparing the bobbin correctly ensures smooth stitching and proper thread flow. Use a class 15 metal bobbin, as specified in your machine’s manual. Wind the thread evenly around the bobbin, leaving a small amount unwound for easy starting. Insert the bobbin into the bobbin case, ensuring it aligns with the machine’s tension spring. Gently pull the thread to set the tension. Place the bobbin case into the machine’s bobbin area, following the arrows indicated on the case and machine. Make sure the bobbin is securely seated and the thread is properly aligned. Always refer to your machine’s manual for specific bobbin preparation instructions, as models may vary. Properly prepared bobbins prevent thread breakage and ensure consistent stitching quality.
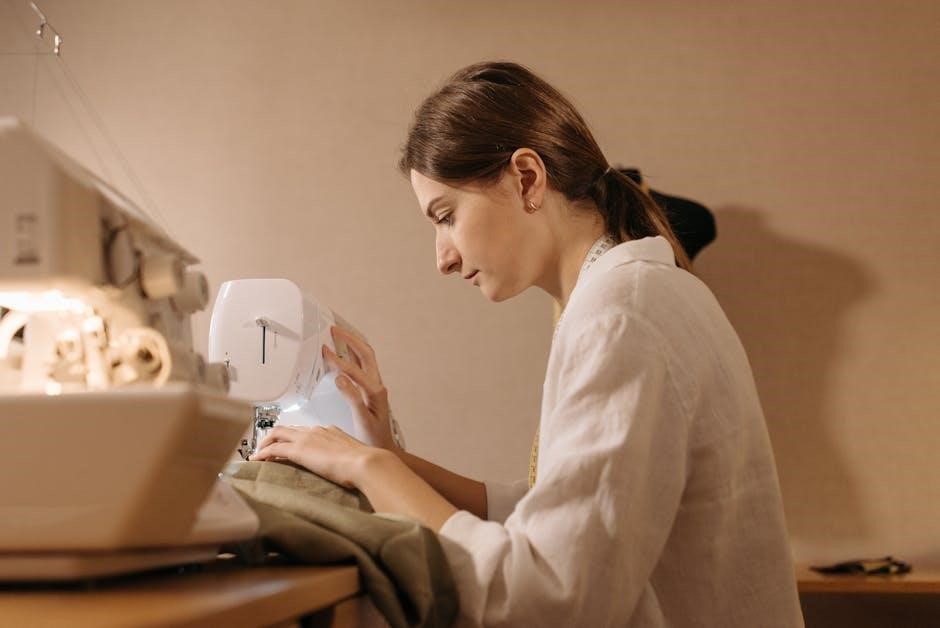
Operating the Machine
Hold the machine firmly with your right hand, using your thumb to operate the power switch. Guide the fabric with your left hand for precise control. Avoid rushing the machine to ensure even stitching.
5.1 Basic Sewing Techniques
Start by holding the machine firmly with your right hand, using your thumb to control the power switch. Guide the fabric with your left hand, ensuring smooth movement. Begin by threading the machine correctly and inserting the needle as instructed. Place the fabric under the needle, aligning the edge with the guide. Gently press the power switch to start sewing, maintaining steady pressure. For straight stitches, move the fabric evenly without pulling. To backstitch, reverse the fabric direction slightly before continuing. Practice on scrap fabric to master control and stitch consistency. Always keep the work area well-lit and clear of obstacles for optimal results.
5.2 Adjusting Stitch Length and Speed
To customize your sewing experience, adjust the stitch length using the dial or button on your machine. Shorter stitches are ideal for delicate fabrics, while longer stitches suit thicker materials. Dual-speed machines allow you to toggle between high and low settings, offering more control for intricate or rapid sewing tasks. Always ensure the thread is properly tensioned to maintain consistent stitching. For precise adjustments, refer to the machine’s control panel or manual. Testing different settings on scrap fabric can help you achieve the desired results. Adjusting these settings enhances the quality of your stitches and adapts to various sewing needs. Proper adjustment ensures smooth operation and professional-looking seams.
- Use the stitch length dial for precise control.
- Opt for dual-speed functionality when available.
- Test settings on scrap fabric before sewing.
5.3 Holding the Machine Correctly
To ensure optimal control and safety, hold the handheld sewing machine firmly with both hands. Place your right hand on the machine’s body, with your thumb near the power switch for easy operation. Use your left hand to guide the fabric, keeping it taut but not overly stretched. Maintain a steady grip to prevent vibrations or slippage. Avoid holding the machine too loosely, as this may lead to uneven stitching. For precise control, keep your workspace well-lit and clear of obstructions. Always ensure the machine is turned off when not in use or during adjustments. Proper handling enhances accuracy and reduces the risk of accidents, making your sewing experience safer and more efficient. Refer to the manual for specific holding recommendations tailored to your machine model.
- Use both hands for stability and control.
- Guide the fabric with your left hand gently.
- Keep the work area organized and well-lit.
Maintenance and Care
Regular cleaning and proper storage are essential. Use a soft cloth to wipe away dust and debris. Store in a dry, cool place to prevent rust.
6.1 Cleaning the Machine
Regular cleaning is essential to maintain your handheld sewing machine’s performance. Turn off the machine and unplug it before cleaning. Use a soft, dry cloth to gently wipe away dust, thread residue, and debris from the exterior and internal parts. For more thorough cleaning, use compressed air to remove dust from hard-to-reach areas. Avoid using liquids, chemicals, or abrasive materials, as they may damage the machine. Clean the needle area carefully to prevent thread tangling. Always refer to the instruction manual for specific cleaning instructions. Regular maintenance ensures optimal functionality and extends the machine’s lifespan.
6.2 Storing the Machine Properly
Proper storage ensures your handheld sewing machine remains in excellent condition. After cleaning, store it in a dry, cool place away from direct sunlight and moisture. Use a protective case or cover to shield it from dust and damage. Remove any accessories, such as the needle, and store them separately in a small pouch or compartment. If the machine is battery-powered, remove the batteries before storage to prevent corrosion. Avoid storing it in extreme temperatures or humid environments. Regularly inspect the machine before storing it long-term. Always refer to the instruction manual for specific storage recommendations to maintain its functionality and longevity.
Troubleshooting Common Issues
Address common problems like thread breakage, jamming, and needle issues by checking tension, clearing debris, and ensuring proper needle installation. Refer to the manual for solutions.
7.1 Thread Breakage and Tension Problems
Thread breakage and tension issues are common challenges. Ensure proper threading by following the machine’s path. Check for tangles or knots in the thread. Adjust tension by turning the tension dial—loosen if thread is too tight, tighten if too loose. Incorrect needle installation can also cause thread breakage. Always use a standard sewing machine needle, ensuring the flat side faces forward. Avoid overtightening, as this can lead to thread snapping. Keep the machine clean, as debris can interfere with thread flow. If issues persist, consult the manual for specific adjustments. Using high-quality thread and maintaining the correct tension will enhance sewing performance.
7.2 Jamming and Needle Breakage
Jamming and needle breakage can disrupt your sewing process. These issues often occur due to improper threading, using the wrong needle type, or forcing fabric through the machine. To prevent jams, ensure the machine is clean and free from debris. Use a standard sewing machine needle, installed correctly with the flat side facing forward. Avoid pulling fabric too quickly or forcefully, as this can cause the needle to bend or break. If a jam occurs, turn off the machine, gently remove the fabric, and rethread. For persistent issues, consult the instruction manual for troubleshooting steps. Regular maintenance and proper handling will minimize these problems.
7.3 Power and Battery Issues
Power and battery issues are common in handheld sewing machines. Low battery power or incorrect installation can cause the machine to malfunction. Always use the recommended battery type and ensure they are properly inserted. If the machine stops working, check the battery connections and replace them if necessary. Avoid overusing the machine without recharging, as this can drain the battery quickly. If the issue persists, refer to the instruction manual for troubleshooting steps. Never use damaged batteries, as this can lead to machine failure or safety hazards. Regularly checking and maintaining the power source will ensure optimal performance and extend the machine’s lifespan.
Repair and Replacement
For complex issues, contact a professional. Replace damaged parts like needles or bobbins with genuine accessories. Refer to the manual for guidance on repairs and replacements.
8.1 When to Contact a Professional
If your handheld sewing machine experiences severe damage, electrical issues, or complex mechanical failures, it’s advisable to contact a professional technician. Attempts at DIY repairs could worsen the problem or invalidate the warranty. Always refer to the manual for troubleshooting guidance, but for issues beyond basic maintenance, seek expert assistance to ensure safety and proper functioning of the device. This approach helps maintain the machine’s longevity and performance, especially for intricate repairs that require specialized tools or knowledge.
8.2 Replacing Parts and Accessories
Replacing parts and accessories on your handheld sewing machine is essential for maintaining its performance. Always use genuine or compatible replacements to ensure proper functioning. If the needle, bobbin, or other components are damaged, replace them promptly to avoid further damage or ineffective stitching.Refer to the manual for specific part numbers and installation guidance. Avoid using non-genuine parts, as they may lead to malfunctions. For complex replacements, consider consulting a professional to ensure accuracy and safety. Regularly check and replace worn-out parts to keep your machine operating efficiently and extend its lifespan.
Advanced Techniques
Master advanced sewing skills, such as stitching on various fabrics, creating decorative patterns, and precision stitching. Experiment with different techniques to enhance your sewing projects creatively.
9.1 Sewing Different Fabric Types
When using a handheld sewing machine, it’s essential to adjust your technique based on the fabric type. For delicate fabrics like silk or chiffon, use a lighter touch and a sharp needle to prevent tears. Cotton and linen work well with standard settings, while thicker materials like denim may require a heavier-duty needle and slower operation. Always choose the appropriate thread type and tension for the fabric to ensure even stitching. Experiment with different speeds and pressures to achieve the best results. Proper fabric handling and alignment are key to avoiding puckering or misalignment, especially on stretchy or slippery fabrics. This versatility makes handheld machines ideal for a wide range of sewing tasks.
9.2 Creating Decorative Stitches
Handheld sewing machines allow for creative stitching by adjusting thread tension and needle position. Use a sharp needle and thin thread for intricate designs. To create decorative stitches, experiment with backstitch, straight stitch, or zigzag patterns by manually guiding the fabric. For consistent results, maintain steady pressure and speed. Twin needles can be used for parallel lines or textured effects. Always test stitches on scrap fabric first to ensure proper tension and alignment. Decorative stitching enhances both functional and aesthetic aspects of sewing projects, making handheld machines versatile tools for crafters and sewists alike. This technique adds a personal touch to garments, home decor, or accessories with ease and portability.
Legal and Documentation
Ensure compliance with warranty terms and manufacturer support. Download the instruction manual PDF for detailed guidelines. Respect copyright and usage rights when sharing or reproducing content.
10.1 Warranty and Manufacturer Support
Your handheld sewing machine typically comes with a limited warranty covering manufacturing defects for a specified period, usually one year. Registration may be required for warranty activation. Contact the manufacturer for claims or inquiries. Support is available through phone, email, or the official website. Refer to the instruction manual for detailed terms and conditions. Ensure proper usage and maintenance to avoid voiding the warranty. Manufacturer support often includes troubleshooting guides and replacement parts. For issues, visit authorized service centers or consult the provided contact information. Always retain the purchase receipt and warranty document for verification. Warranty coverage varies by region and manufacturer, so review the terms carefully before purchasing. Proper care and adherence to guidelines ensure optimal performance and warranty validity.
10.2 Downloading the Instruction Manual PDF
To access the instruction manual for your handheld sewing machine, visit the manufacturer’s official website. Models like the emerio SEW-122595.2, Singer Stitch Sew Quick, or Magicfly Mini often have downloadable PDFs. Search for your specific model number to find the correct manual. Ensure you download from trusted sources to avoid unauthorized versions. The PDF typically includes detailed setup, usage, and troubleshooting guides. It also covers safety precautions, maintenance tips, and warranty information. Save the manual for future reference or print it for easy access. If you encounter issues, contact customer support for assistance. Always refer to the official manual for accurate information to ensure proper machine operation and longevity. This resource is essential for maximizing your handheld sewing machine’s performance and understanding its features fully.
10.3 Copyright and Usage Rights
The content of this manual is protected by copyright laws. Reproduction, distribution, or modification without the manufacturer’s consent is prohibited. The handheld sewing machine instructions PDF is provided for personal, non-commercial use only. Any unauthorized use or duplication violates intellectual property rights. Always ensure you are using the latest version of the manual, as updates may include new information or corrections. Redistribution of the manual requires explicit permission from the copyright holder. Respect the manufacturer’s rights by adhering to these guidelines. For specific details, refer to the copyright notice within the PDF. Proper attribution must be given if quoting or referencing the manual. Failure to comply may result in legal consequences. Ensure all usage aligns with the terms outlined in the document. Always prioritize respecting intellectual property rights. This ensures continued access to accurate and reliable information for all users. The manufacturer retains all rights to the content provided. Adhering to these guidelines supports the creation of high-quality resources and protects both users and creators. By using the manual, you agree to these terms and conditions. Avoid any actions that infringe on the manufacturer’s rights or intellectual property. This helps maintain trust and ensures the manual remains a valuable resource for everyone. Always verify the source of the manual to avoid unauthorized versions. This protects both the user and the manufacturer from potential legal issues. Respecting copyright and usage rights is essential for maintaining the integrity of the information provided. Never share or reproduce the manual without proper authorization. This ensures the content remains accurate and up-to-date for all users. By following these guidelines, you contribute to the fair use of intellectual property and support the ongoing provision of quality resources. Always prioritize legal and ethical usage of the handheld sewing machine instructions PDF. This not only protects your rights but also those of the manufacturer. Remember, unauthorized use can lead to serious consequences. Stay informed and adhere to the terms provided in the manual. This ensures a positive experience for all parties involved. The manufacturer appreciates your cooperation in respecting their intellectual property rights. Together, we can maintain a trusted and reliable source of information for handheld sewing machine users worldwide. Always choose to respect copyright and usage rights for the benefit of everyone. This fosters a community of responsible users who value and protect intellectual property. By doing so, you help preserve the quality and availability of resources like the handheld sewing machine instructions PDF. Thank you for your understanding and cooperation. Your adherence to these guidelines is greatly appreciated. Together, we can ensure the continued success and accessibility of these valuable resources. Always remember, respecting copyright and usage rights is a shared responsibility. Let’s work together to uphold these standards for the benefit of all. This concludes the section on copyright and usage rights. Please refer to the manual for further details if needed.
